
Building a bigger oven
For small workpieces adopting traditional kitchen oven is best option. For bigger volumes, probably you will decide to construct your own. Web has plenty of tutorials about dealing with this task, here I will only share my experience.
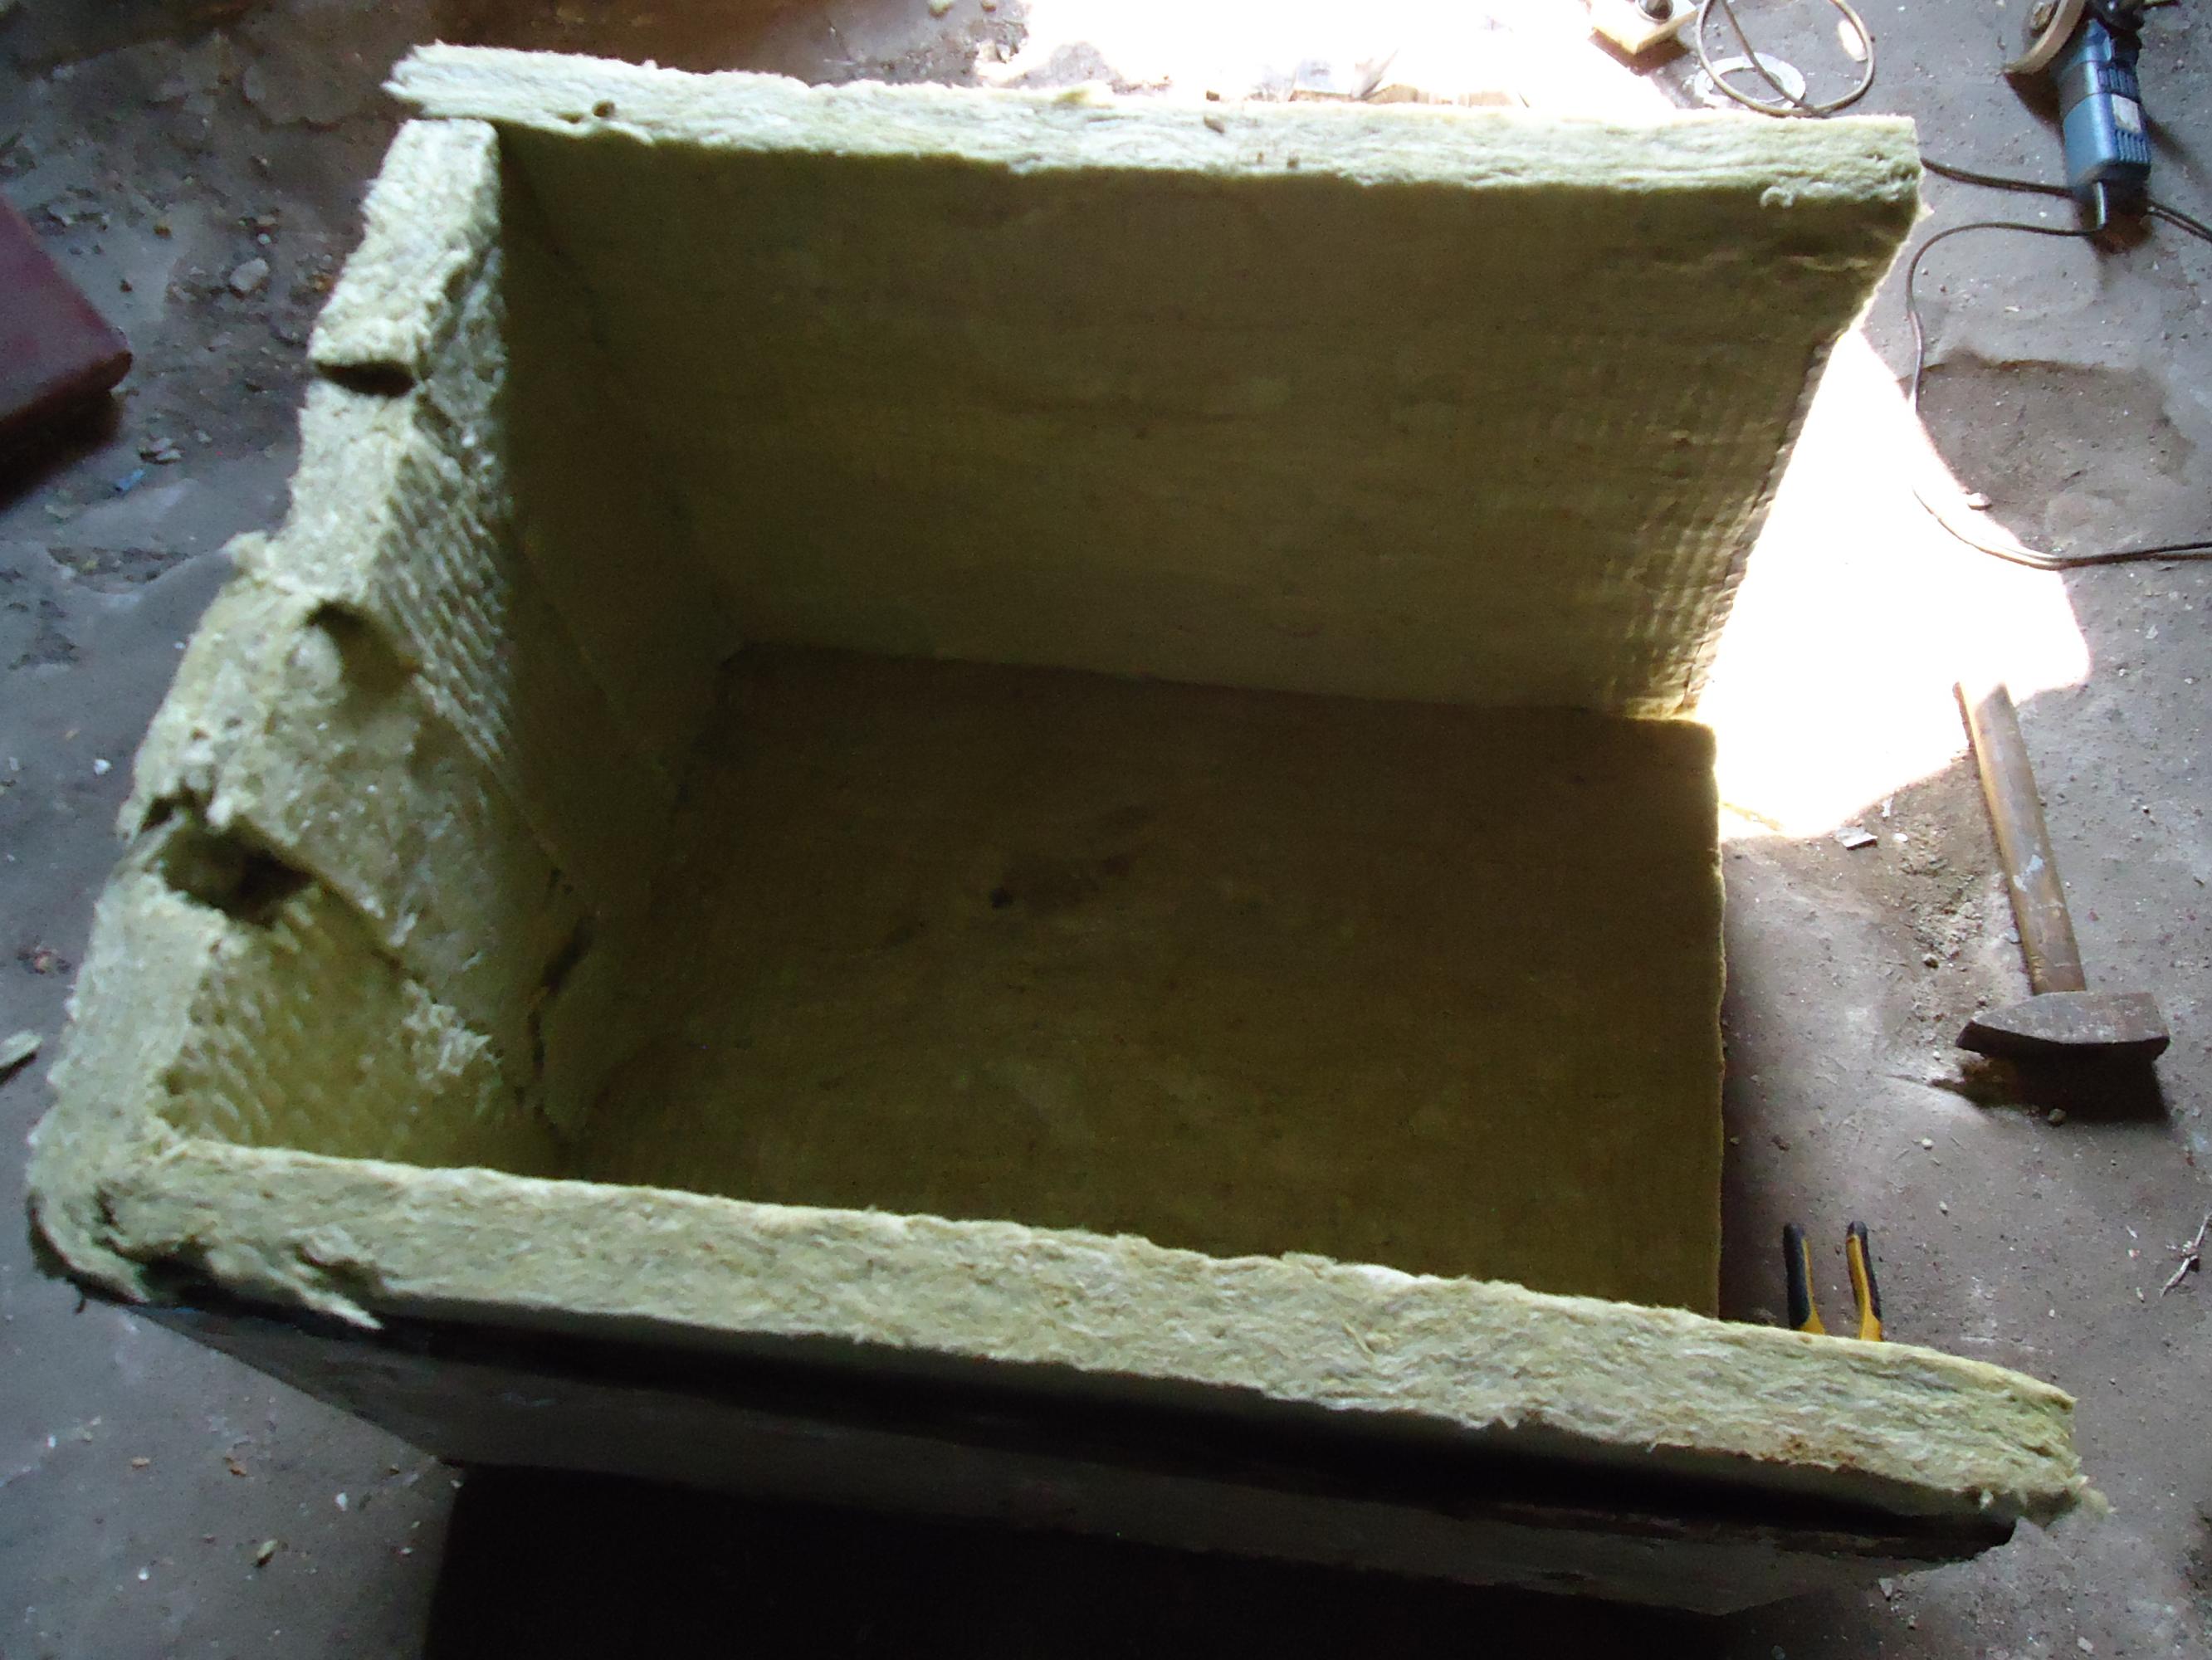
Oven job is simple: keep constant air temperature in isolated part of space. If less heat finds its way out of this space then insulation is better and less power (and money) is needed to keep same temperature. Having this thought in mind, accomplish this aim in most straight way, maybe not elegant. For sure, whole construction can't collapse under its own weight. As building materials I have used some rusty sheets of metal from junk yard, some of them removed from home appliances. Use MIG welding to connect cut sheets, screws and rivets otherwise. As an heat insulator, mineral wool in plates of thickness of 50mm was chosen. Non flammable, cheap, popular and easy to get material for buildings insulation. Be careful while installing or cutting wool - because of its microfibers, wear protective glasses or goggles and gloves.
Connect and bend metal sheets together into form of cuboid, with one face missing - for front doors. This is internal chamber of our oven, choose the dimensions for your needs. Second, external cuboid is for housing, obviously its size is bigger from the first one - to fit chamber into it with thick wool insulator in between on each side. Holes and gaps on steel sheets connections are simply not important. Doors are made as another block of wool bundled inside steel sheets.

Before putting on housing on chamber, install all the cables for heaters and temp probes.
As heat source I have been using 4x 500w infrared quartz heater tubes, heaters from domestic ovens are also successfully used. It takes above 20 minutes to just heat up all the volume to 180C degrees when using 2kW of total heating power. Most of the external parts become just a little warm, except a part of front doors (thermal bridge), where heat leaks mostly.
Temperature regulator
Curing process takes place in temperature between 180 - 220C, industrial or any regulator form domestic oven fits this range, mechanical or electronic one. It is optional to build it anyway, from one shared project. It is based on atmega microcontroller and has all you need: desired temp selection, timer with buzzer and its operated by two buttons and rotary encoder. After PCB layout or software modifications it can be adopted to something different.


Easy to build temperature controller, everyone who has even a little experience with AVR microcontrollers and electronics can copy this without problems. Thermistor similar to these from 3d printers head is used as temperature sensor.
Air supply compressor
Powder coating guns need much less air than spray guns. Any small air compressor should handle them, maybe except the tiny units.
Compressor project described bellow will last years and will be useful in any garage or even house, where some compressed air is needed (ex. electronics cleaning). Freezer compressors are good basis for building own one, in fridge it compresses refrigerant gas and works fine with air. Internet is full of pics, videos and instructions of those inventions. The only one disadvantage is that such compressor has small output ratio (1-1.5 m3/h) but high useful pressure. Motor and mechanics are sealed and silent, it has its own oil lubrication system, which ensures longevity of whole unit. Don't remove the oil, very little amount will appear with condensate in filter and it is normal. Search for older ones compressors, working on R12 or R134a refrigerants, they are well made and can work at pressures above 1000 kPa. Be aware of newer R600a compressors, they are designed for lower working pressures and are worse in general.


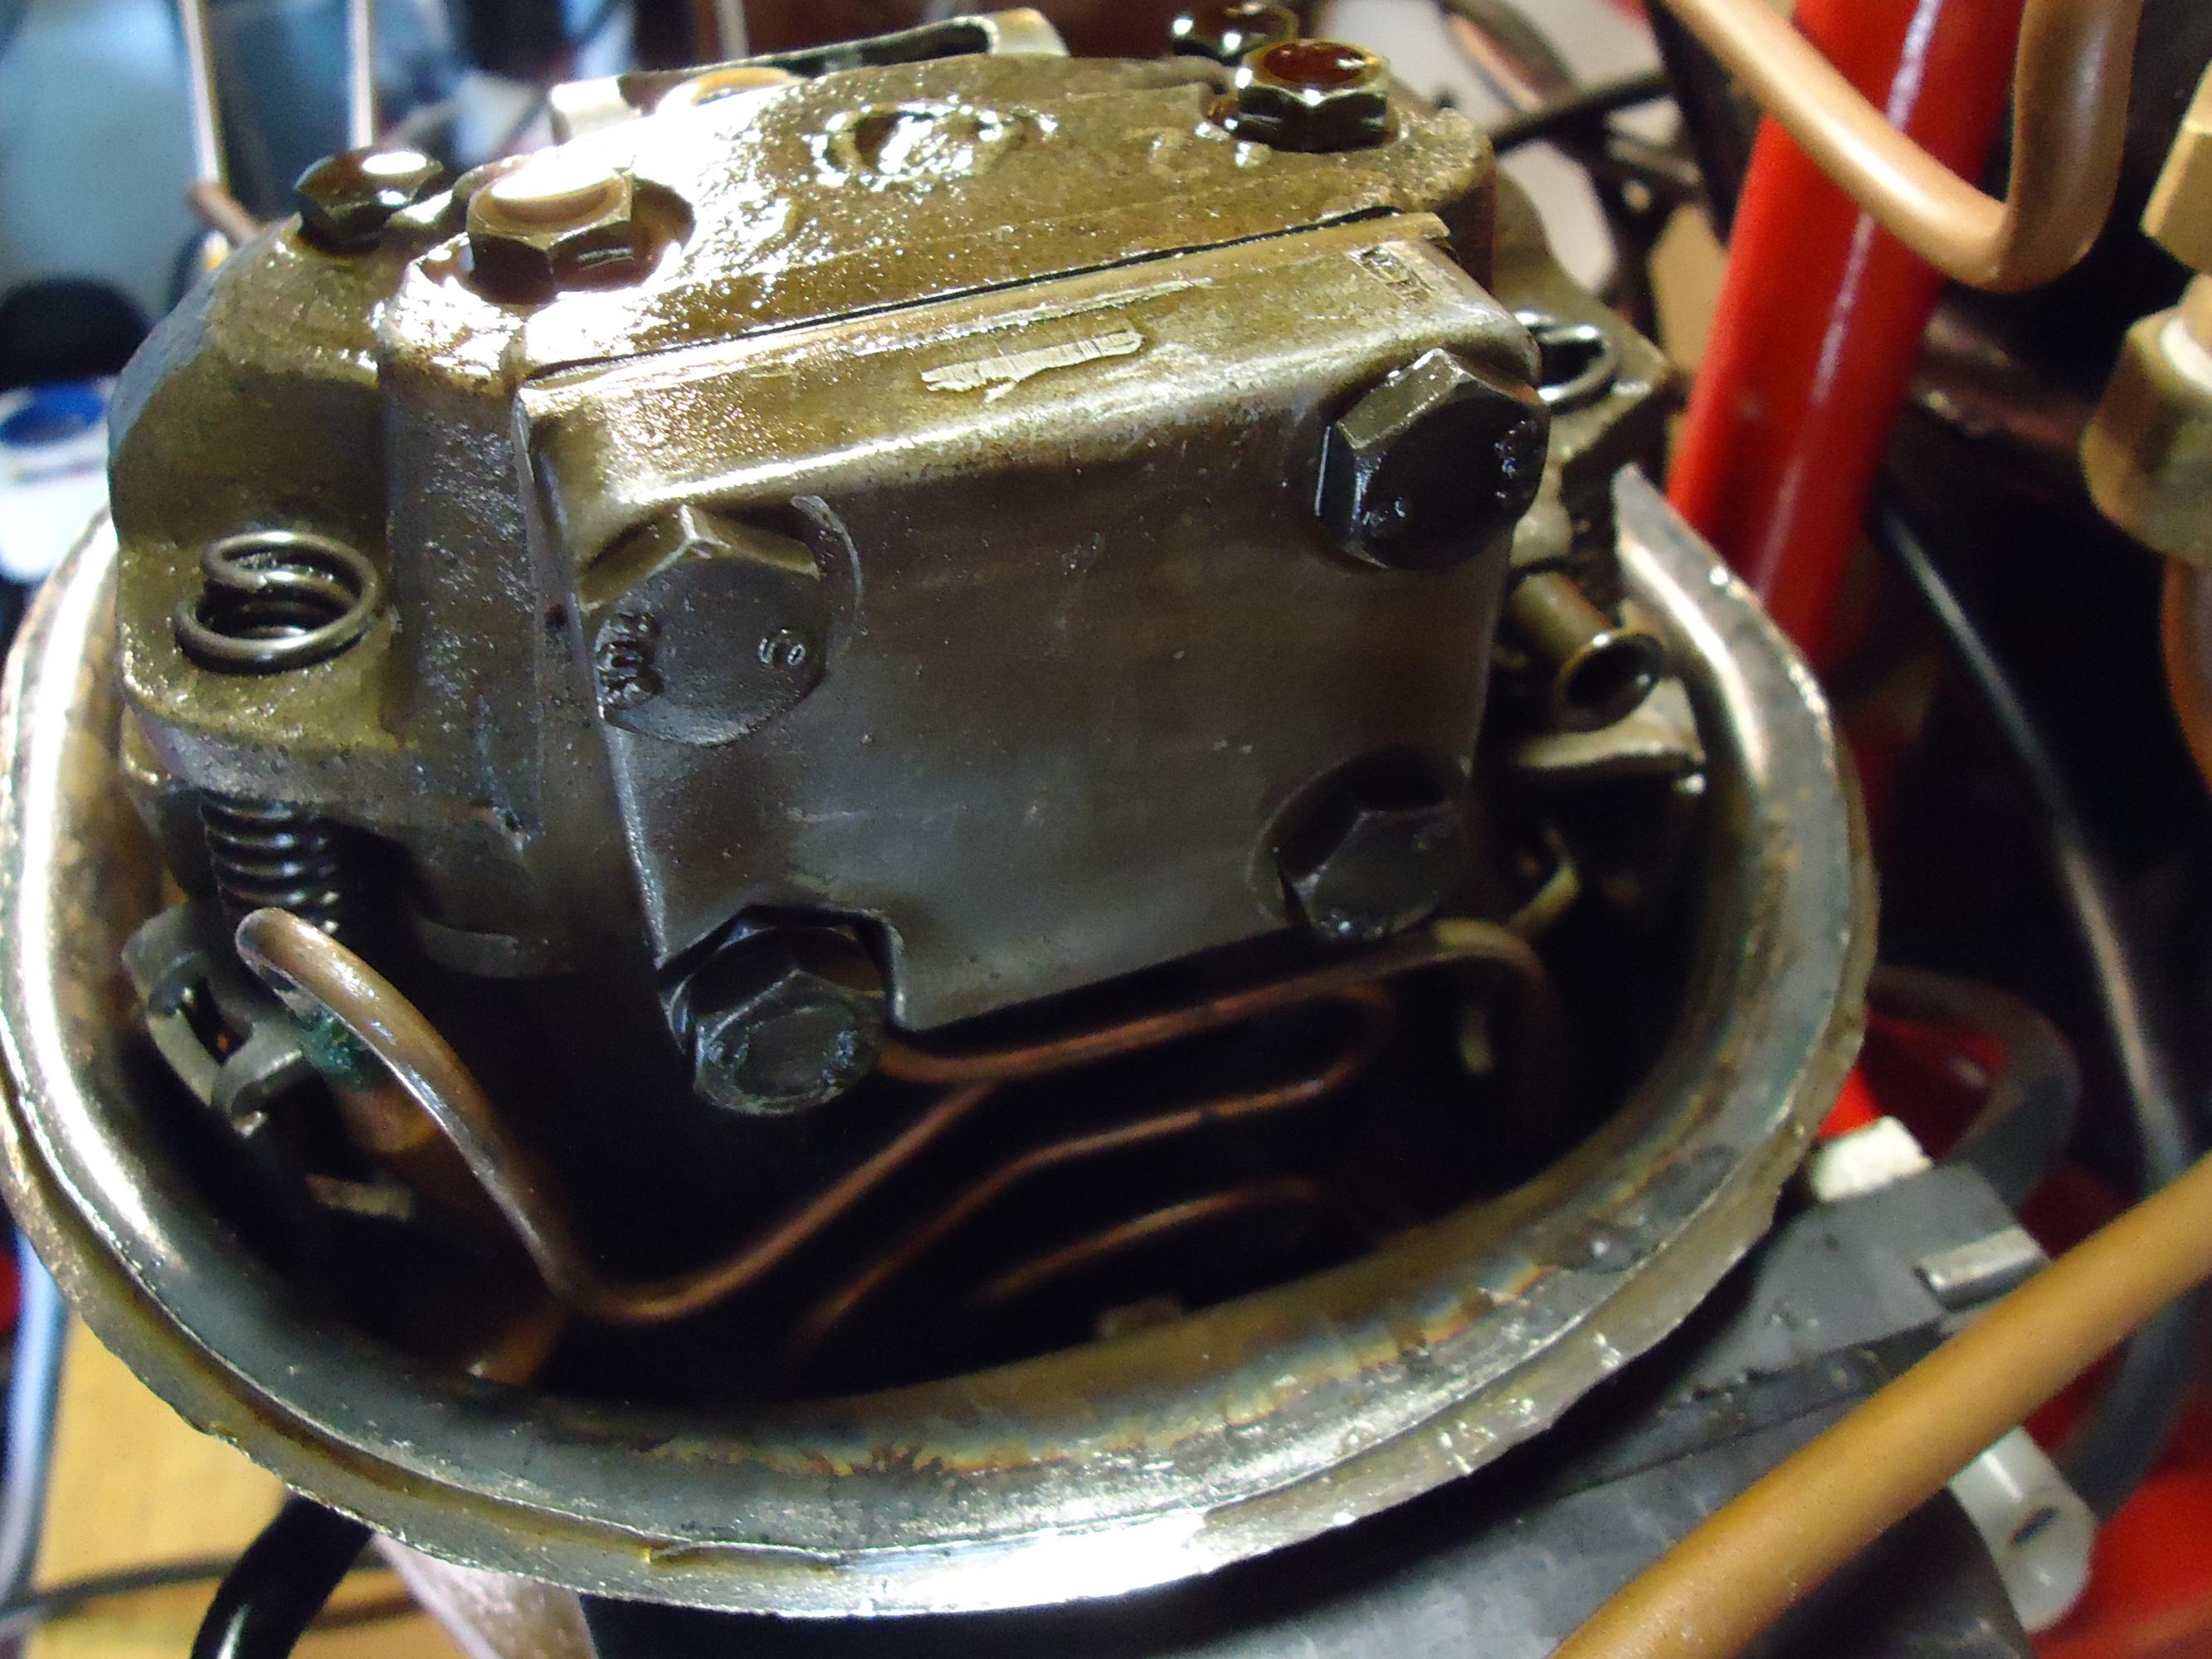
Some pics of inside of opened freezer compressor. Of course there is no need to cut off the casing hull, like I did. The whole structure is massive and durable, mechanical parts are mostly the cast iron. Whole volume under the hull is a low pressure (suction) side.
Some notes about compressor electrics
Single phase asynchronous induction motors used in those compressors struggle to start from one phase supply. As a solution pair of windings is applied: first one is working all the time, second is a starting winding fired up only for a fraction of second when motor starts spinning. More detailed: phase shift, needed to generate starting torque, is produced by additional capacitor or high resistance of the start winding, continuous work of this winding results in quick overheating and shorting. Therefore winding is turned on and off by additional device: relay or in newer ones, thermistor. Thermistor has a small disadvantage: needs to cool down before motor can start again, so yeah you have to wait least of all 30-60 seconds between work cycles.
Second device in motor equipment is overload protector, connected in series, don't remove it.
Assembly
Because of air pressures involved, there is no place for sloppy work. Some of the connections need TIG/MIG welding, so probably you have to delegate this job to someone if you are not able to do it on your own.
Aside of two fridge compressor units (two means faster), there are other things to get/buy:
- Steel air tank, 3 - 6 liters. Empty touristic rechargeable butane bottles are fine - just make sure it is not rusty inside.
- Steel box section profile, about 15 x 15mm.
- 2x muff couplings, 1/2'' and 1x 1/4'' (for welding).
- Pneumatic check valve, 1/2'' x 1/2'' made of brass.
- Straight brass union fitting 1/2" x 1/2".
- Brass pipe cap 1/2".
- Compressor pressure control switch 1/4''.
- 2x nipple 1/4''.
- Air pressure regulator with filter 1/4''.
- Quick connector for pneumatics, with 1/4'' thread.
- Safety valve 8.5 bar 1/4''.
- Air pressure gauge 1/4''.
- Some pieces of 6mm copper tube.
- PTFE tape for threads sealing.
- Some screws, washers, cables.
Design is desired to be compact and occupy minimum space as possible. Check drawings bellow.
 Weld muffs to main pipe, main pipe is sealed at the top end with handle welded, made of bended thicker steel wire.
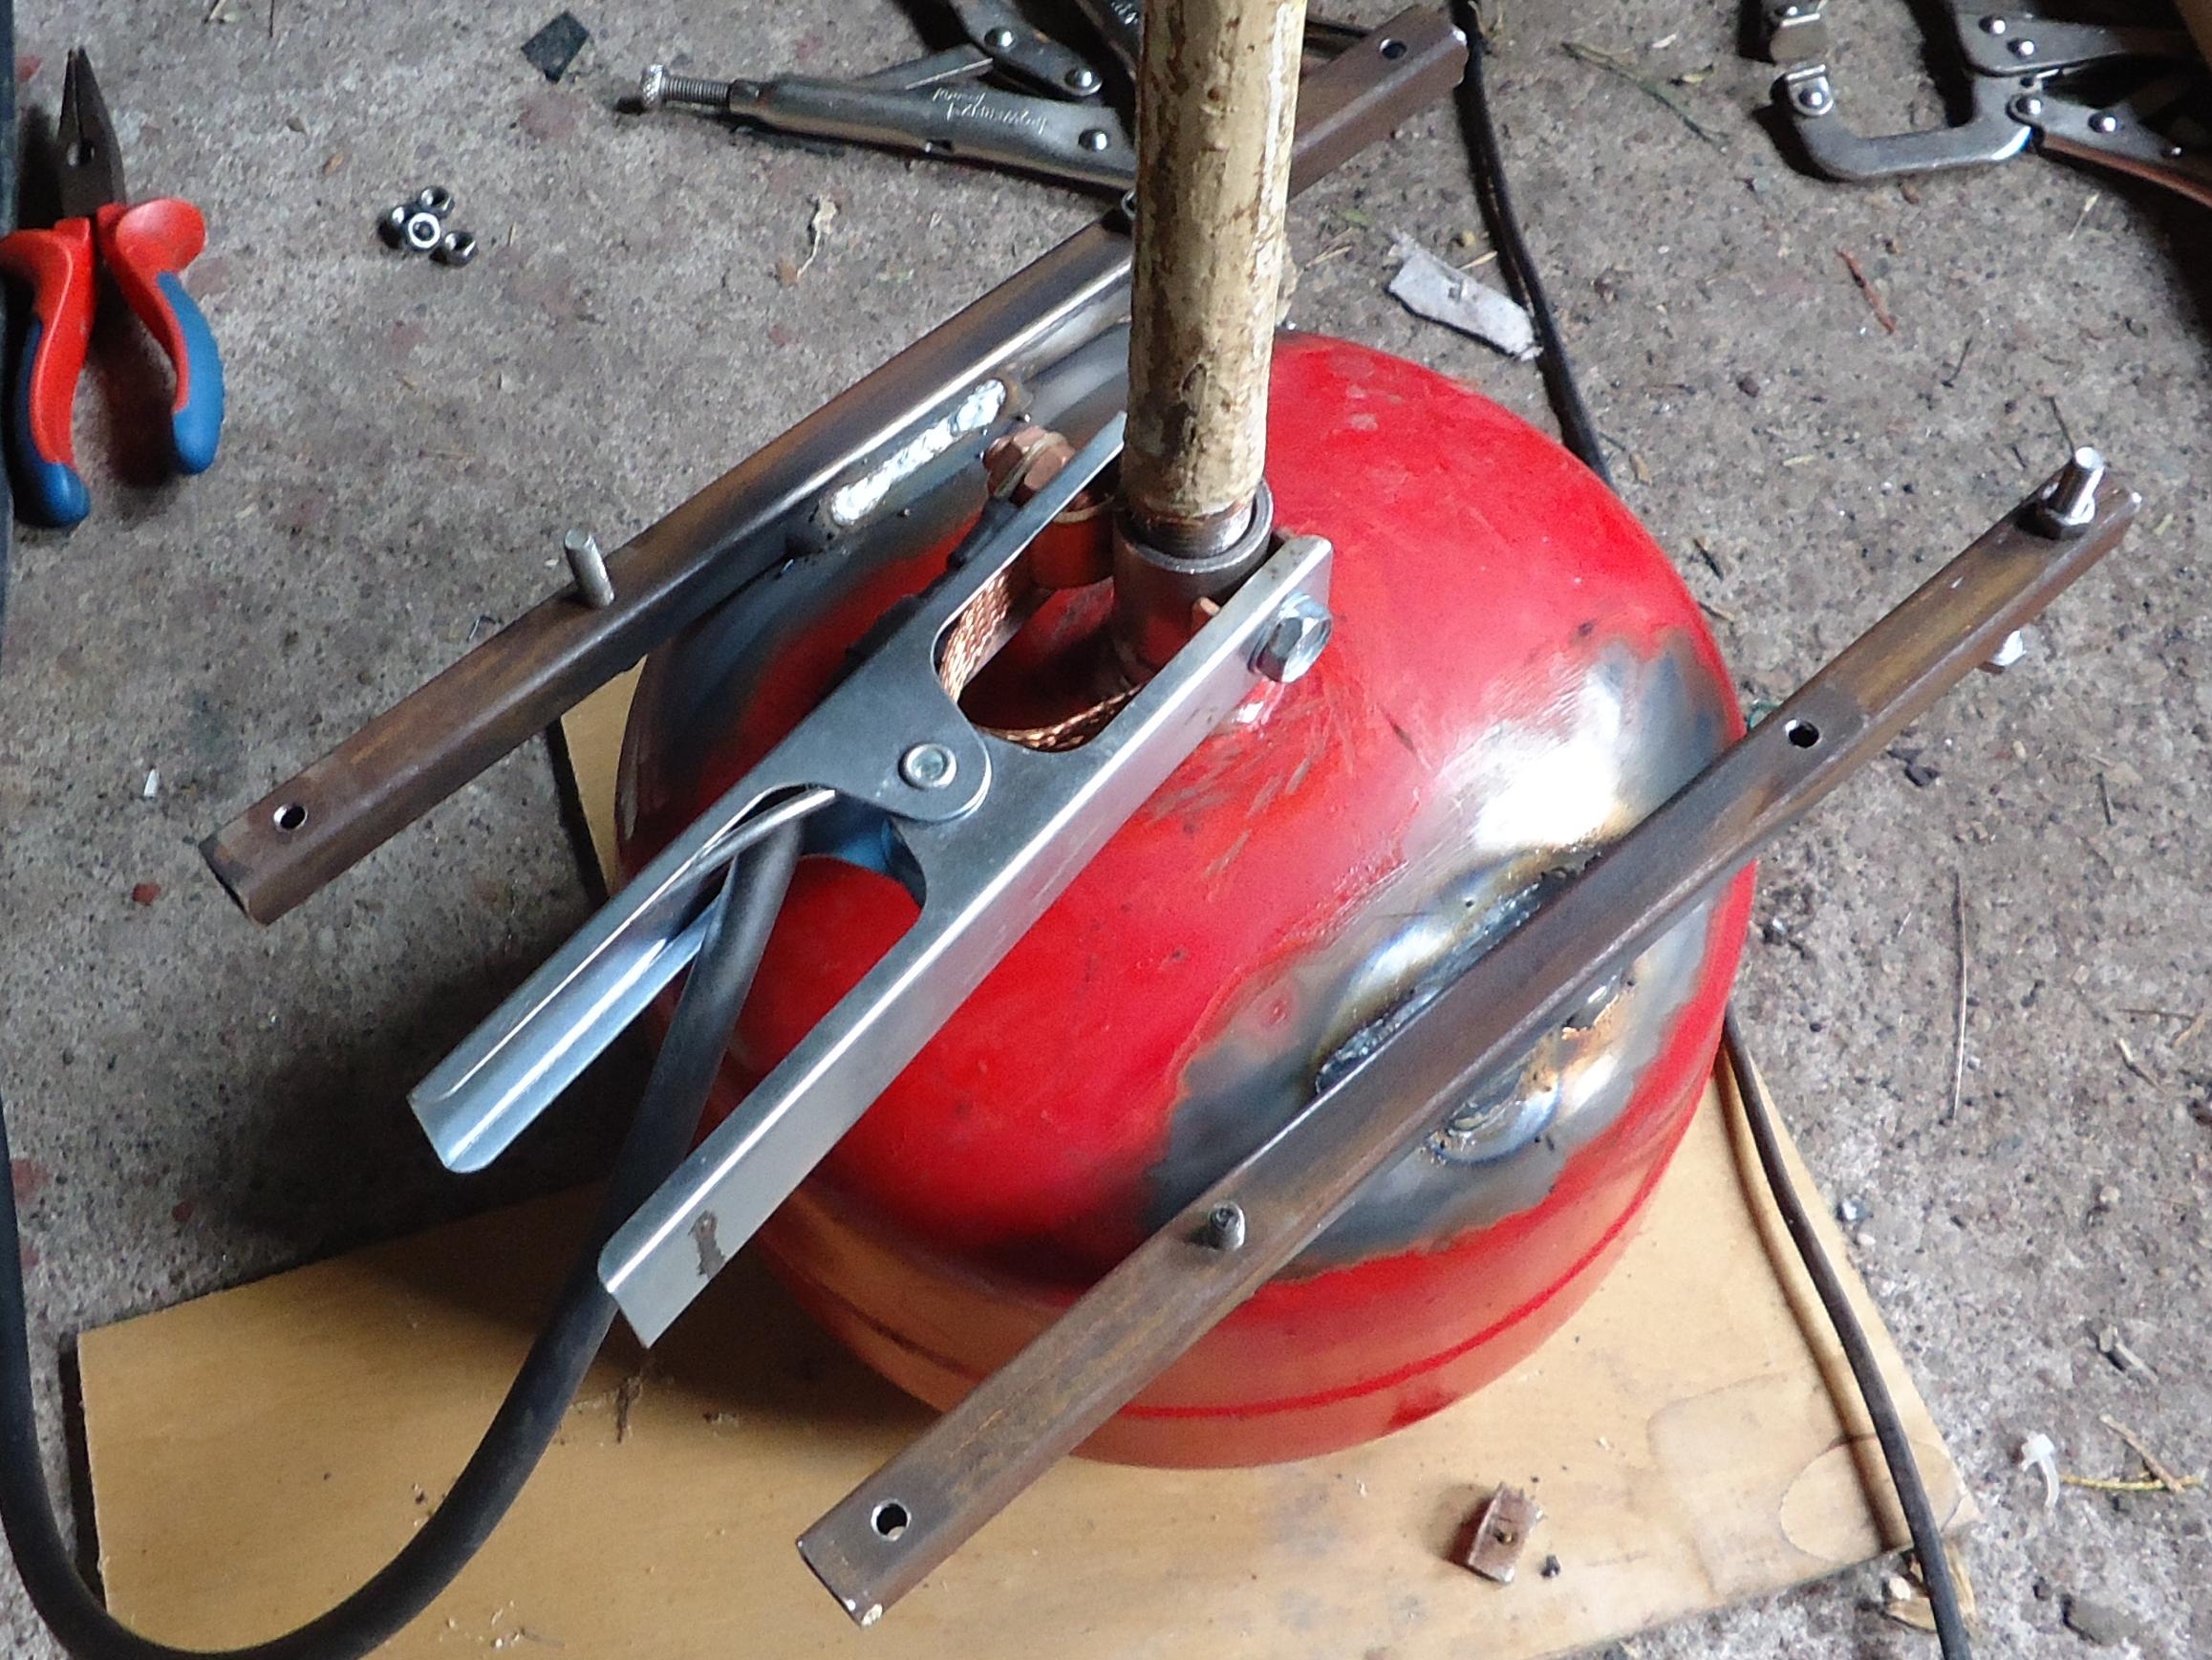
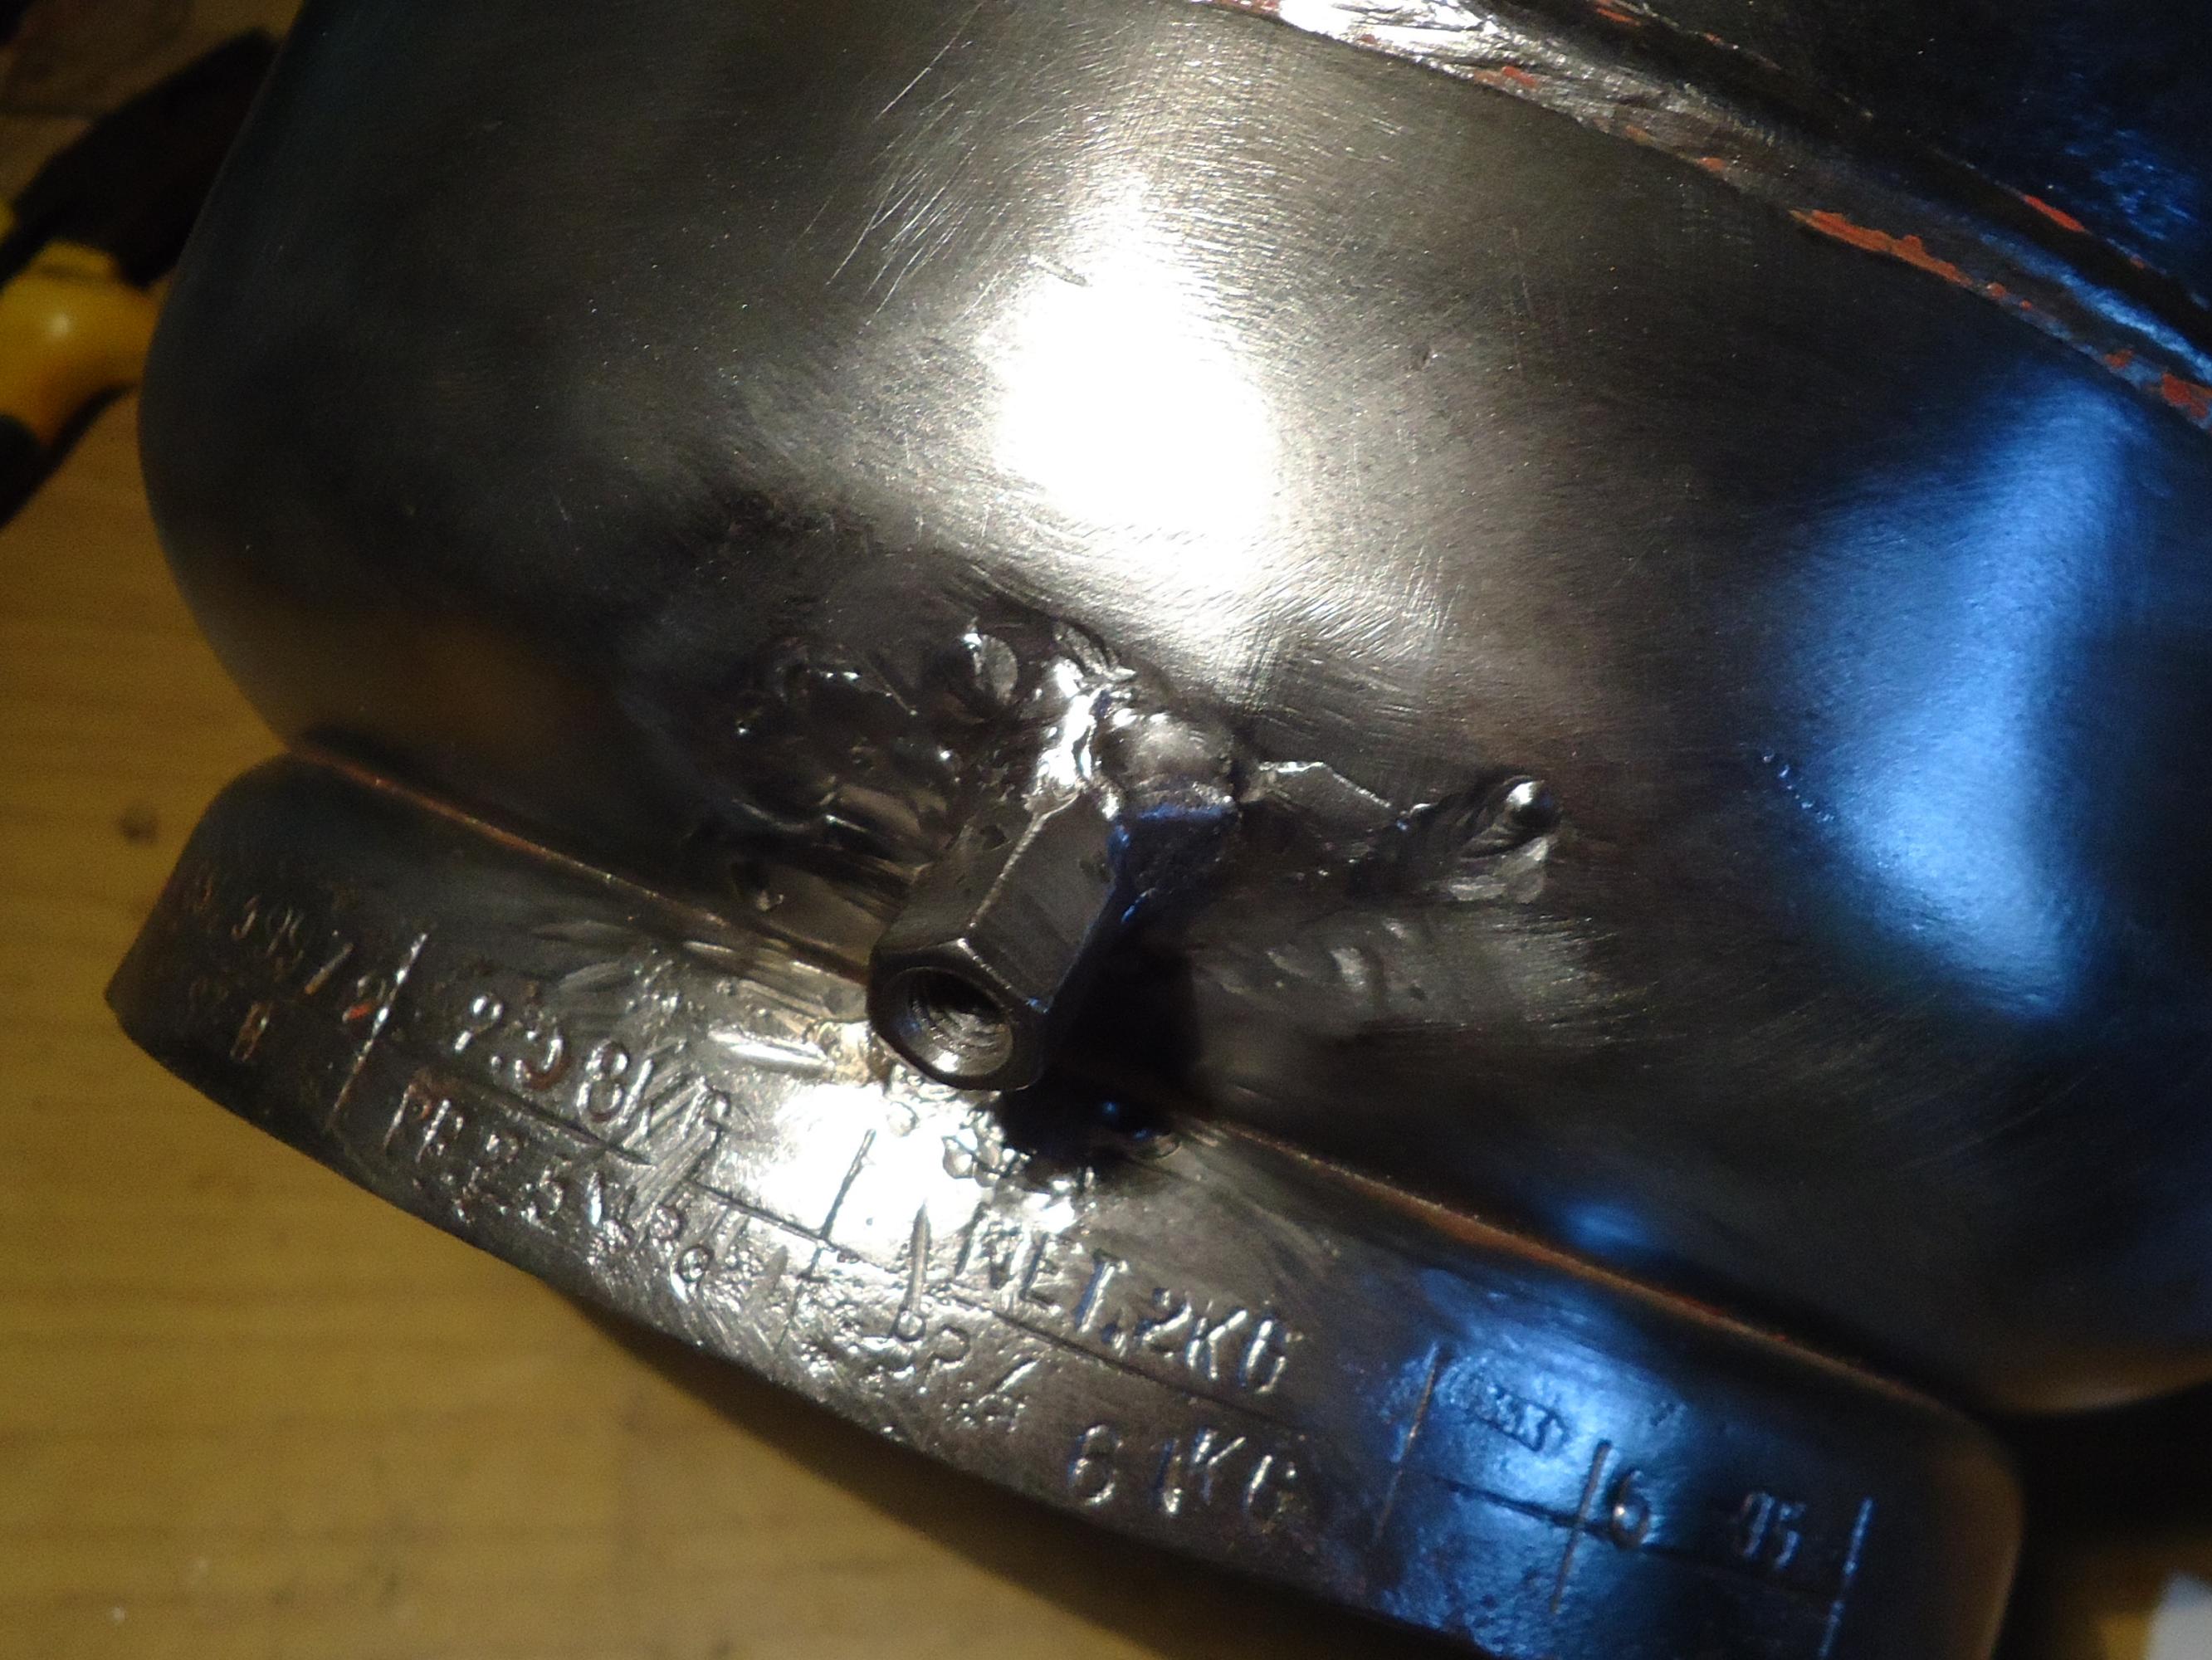
Start welding job from muffle on the center on the top of the tank. On the bottom of the tank weld longer M6 nut for draining water condensed from air. Drill hole in tank after nut is welded. Pump the tank with air and check all the connections for leaks with soapy water mixture. TIG welding technique suits best those tasks. Lastly MIG weld profiles to the tank, it is sane to keep them mounted to piece of wood templates to prevent all the dimensions from moving.
 Main pipe.


Solder two copper pipes into drilled holes in cap. Those pipes are discharge from the compressors, bend and connect them nicely by soldering, as second image shows.


Check valve connections, under pressure switch you can notice a securing valve. On the left: simple air tank water drain valve. Rubbery pad at tank bottom attenuates vibrating noises.
 Tank after paint job, powder coated with DIY gun for sure.


Views on finished machine, secure compressors suction lines with a small automotive paper fuel filters.
- 1
- 2
@ zonkil Just type '555 timer flyback driver' in your favorite search engine and you will get a lot of material to start with. Gun works - people were building similar designs for years, but applying a second layer of powder is more problematic.
will normal powder coatings be compatible with this gun?
Ok i made that gun and it works preety well thank you so much
why is it more problematic applying a second layer of powder? because the flyback transformer have a positive output? Also i'm thinking into building a same powder coating gun with a flyback transformer. Which is the safest way to do it? i mean how a can limit the amps to the bare minimum in case of an accidental touch?! Thanks in advance!
Thanks , I've just been searching for information approximately this subject for a while and yours is the best I have discovered till now. However, what concerning the conclusion? Are yyou sure about the supply? тестостерон site кломед купить
Hello, I'm very interested in this build. Is is possible to provide a "full" construction manual? Especially schematic and model for 3D printer? Many thanks
how much time did it cost you before you made it? on ebay it costs $ 120 and it's much better
Could you please share 3d print files?
How to get the stl files?
Nice! After trying sprinkling powder on hot metal and getting mixed results, I came here looking for info on DIY tribo guns. The commercial ones seem overpriced for what they are, even the low cost ones, compared to low cost liquid spray guns. I found self adhesive PTFE tape. If I go ahead, I plan to print the tube and the tribo zig-zag together in 2 halves which will clip or screw together. Screws are easier but won't look as neat. Anny updates on the tribo gun performance or mods?
Witam czy jest możliwość uzyskania projektu do druku 3d
Could you send me a diagram and connection of this HV power supply? I would be very grateful because I would like to do the same. Does this gun work?